
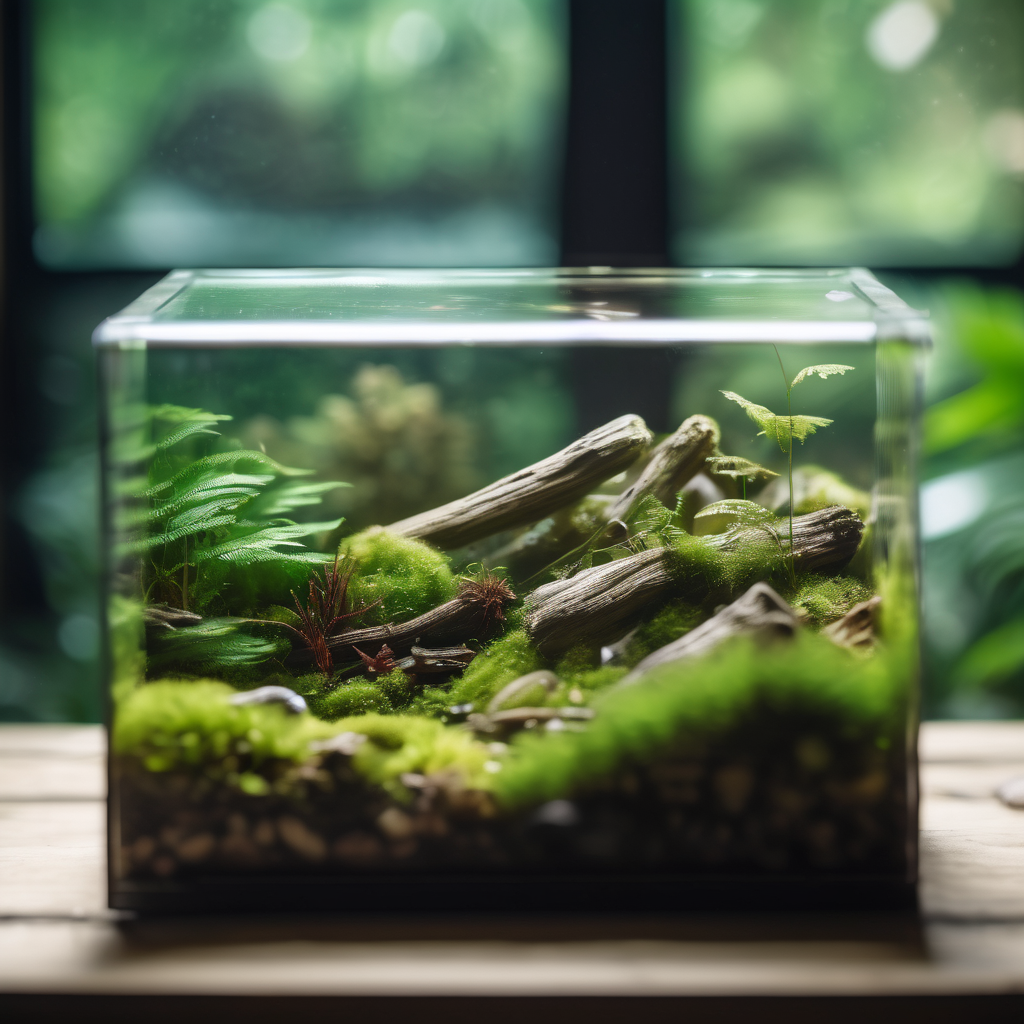
A paludarium is the most attractive kind of enclosure most keepers will ever build and the one they get wrong most often. The concept is simple — land and water in the same tank, like the bank of a stream — and the execution is where the problems start. Too much water and the animal cannot climb out. No drainage layer and the soil turns to sludge. Unsealed rock and the water chemistry swings wildly. No lid and a newt walks across the living room floor.
This guide walks the build from the empty glass up: planning the layout, sealing it, hardscape, drainage and substrate, plants, water and filtration, cycling, stocking, and the maintenance routine that keeps it alive a year later. It applies to the species that actually suit this setup — fire-bellied newts, fire-bellied toads, African dwarf frogs, some small crayfish and shrimp arrangements, and certain small semi-aquatic reptiles.
What a paludarium is — and is not
A paludarium is a land-and-water enclosure, from the Latin for “marsh”. The land portion is a raised slope or island; the water portion is a genuine body of water with depth somewhere in the tank. That distinguishes it from a fully aquatic tank with a rock ledge, and from a dry terrarium with a water bowl.
What it is not is a general-purpose tank. A corn snake, a leopard gecko or a crested gecko does not belong in a paludarium, and putting one there because it looks good is how animals drown or develop scale rot. Match the enclosure to the animal first, aesthetic second.
Which animals belong in a paludarium
Paludariums suit animals that split their time between shallow water and damp land:
- Fire-bellied newts and fire-bellied toads — the classic paludarium inhabitants, needing deep water to swim and land to haul out.
- African dwarf frogs — fully aquatic but weak swimmers that appreciate a shallow land edge and heavy planting.
- Small crayfish and shrimp — inverts that use land edges and hardscape heavily.
- Some small turtles as juveniles — though this is an advanced build, since turtles are messy and most outgrow any tank you can practically heat and filter.
Size the tank to the animals before you design it. A 20-gallon long (roughly 75×30×30 cm) is the practical minimum for a pair of fire-bellied newts, and larger is always easier to keep stable. Small volumes swing in temperature and chemistry within hours.
Planning the layout on paper
Before you buy anything, decide the land-to-water ratio and where each goes. The most reliable design splits the tank along its length: water in the front third, land rising behind it. That gives you:
- A viewing pane down the front, showing both habitats through the glass.
- A shallow shore where the land meets the water, which is where the animals spend most of their time.
- A hidden rear area for the filter, heater and drainage overflow.
Aim for roughly one third water, two thirds land for most amphibian setups, with a gentle slope rather than a step. Amphibians climb shallow slopes easily and struggle with sharp drops into deep water. For species that swim more, push it to half and half.
Also decide, in advance, where the lid clips go, where the filter goes, where the light goes, and where the heater sits. Retrofitting those after the tank is built is what creates the cracked-glass disasters that fill forums.
Sealing and building the hardscape
This is the step people rush and regret.
Choose safe materials
Only use inert, water-safe materials. Safe: aquarium silicone, non-toxic epoxy putty, sealed slate, sealed rock, resin and ceramic hardscape, aquarium-safe background foam. Avoid: driftwood that has not been soaked and leached (it releases tannins and can rot), anything painted, and any rock with metal veins or carbonate content if you keep soft-water species.
Build the structure with foam and epoxy
The standard method for a natural-looking land slope:
- Cut polystyrene foam blocks to the shape of the land mass and glue them together and to the back glass with aquarium-safe silicone.
- Coat the visible foam with epoxy putty or a cement-based coating so no bare foam touches soil or water. Bare foam in a damp tank breaks down.
- Work out where the water line will be and silicone the land-to-glass joints thoroughly, both front and back.
- Let it cure fully — 24-48 hours minimum, longer if the label says so. Adding water to uncured silicone ruins the seal and leaches chemicals into the tank.
Leak-test before anything else
Fill the water area, wait an hour, and check the outside of the glass and the joints for damp patches. A paludarium leak is not a minor annoyance — it is a flooded floor, a ruined piece of furniture and a cold tank full of animals. Test before you commit to soil and plants.
The drainage layer and substrate
The land portion needs a drainage layer or it will become a swamp that smells and breeds bacteria. From the bottom up:
- Drainage layer — 2-3 cm of LECA (expanded clay balls), gravel or a plastic grid. This sits under the soil and lets excess water drain away instead of saturating roots.
- Mesh barrier — a piece of fiberglass screen over the drainage layer so soil cannot fall through into it.
- Soil mix — an ABG-style mix is the standard: roughly equal parts tree fern fiber, orchid bark, peat and activated charcoal, plus a little sphagnum moss. This holds moisture without becoming mud, drains well, and supports the plant and cleanup-crew ecosystem. Plain potting soil is not suitable — it compacts and grows mould.
- Leaf litter and moss — a layer of dried oak or magnolia leaves and live moss over the surface. This gives hiding places, keeps the top from drying, and slowly breaks down to feed the system.
The slope matters here too. The drainage layer should run to the water edge so water leaves the soil and drains into the tank, not pools in a low corner behind the hardscape.
Plants: what thrives and what dies
Paludarium plants need to tolerate damp soil with their roots and drier air above. Reliable choices:
- Mosses — java moss in the water, cushion and sheet moss on the land. Moss is the backbone of a paludarium and the easiest success you will have.
- Ferns — java fern in water, small creeping ferns on the land. Java fern does not even need to be planted; wedge it into hardscape and it attaches itself.
- Pothos and philodendron — planted on the land with roots allowed to trail into the water. They pull nitrates out of the water column and grow fast.
- Anubias and bucephalandra — attached to wood or rock, tolerating low light and slow flow.
- Cryptocoryne and sagittaria — rooted aquatic plants for the water section, given a decent substrate.
Avoid: cacti and succulents (they rot), anything needing dry air, and any plant on a threatened or CITES list. Buy from a reputable aquatic supplier and quarantine new plants in a bucket of water for a week before adding them — plant pests hitchhike constantly.
Filtration and water management
Here is the part most first-time builders under-build. The water in a paludarium is a small, shallow, often warm body of water with animals in it, and it needs real filtration.
Filter choice
Options, in rough order of preference:
- A small internal filter rated for the tank size, hidden behind the hardscape or buried under the land. Simple and effective.
- A small canister filter on larger tanks — quiet, high flow, easier to hide.
- A sponge filter with an air pump — cheap, safe for small animals and inverts, gentle flow, but less mechanical filtration.
Shallow water warms fast and holds less oxygen, so surface agitation matters more than in a deep tank. A spray bar or even a small powerhead aimed across the surface helps. If you keep amphibians that are sensitive to vibration and flow, keep flow low and rely on surface area instead.
Water changes
Plan on 25-30% water changes weekly, more in a heavily stocked tank. Top up evaporation with dechlorinated water — as water evaporates, minerals concentrate, and the hardness of the remaining water climbs. In a paludarium this happens faster than in a lidded aquarium.
Heating
Most paludarium animals come from warm, stable environments: 22-26°C (72-79°F) is the usual target range. Use a submersible heater in the deep water section only, guarded, and cover the rest of the temperature with room temperature and the light. A thermometer in both the land and water areas is not optional — land can run several degrees warmer than water under a lamp, and that gradient is fine, but you need to know the numbers.
Cycling the tank before animals
This is the step that decides whether the tank works or crashes in month two. A new paludarium has no beneficial bacteria. Add the animals immediately and you get an ammonia spike — new tank syndrome — which kills amphibians fast because they absorb water through their skin.
Cycle first: run the filter and light for 4-6 weeks, feed the tank a tiny pinch of fish food or a drop of pure ammonia daily, and test weekly for ammonia, nitrite and nitrate. When ammonia and nitrite read zero and nitrate is present, the tank is cycled and animals can go in. Testing kits are cheap and non-negotiable. For more on the process, our guide to cycling a fish tank covers the same cycle in more depth.
Stocking: the order that actually works
- Build and leak-test the tank.
- Add drainage, soil, leaf litter, hardscape.
- Fill the water and start the filter, heater and light.
- Cycle for 4-6 weeks, testing weekly.
- Add plants and a cleanup crew — springtails and isopods on the land, shrimp or snails in the water.
- Wait two more weeks for the plants and cleanup crew to establish.
- Only then add the animals — and start with a small number, not the full group you eventually want.
Jumping straight to step 7 is the single most common failure in the hobby, and it is fatal to amphibians in particular.
Warning signs: what to fix and when to call a vet
A paludarium tells you when it is going wrong, if you are watching:
- Cloudy, smelly water — usually overfeeding or too little filtration. Increase water changes, check the cleanup crew, feed less.
- Ammonia or nitrite above zero on a test kit — stop feeding, do a 50% water change immediately, and re-test daily until it clears. This is an emergency in an amphibian tank.
- Animals constantly trying to climb out — usually temperature or water quality. Check both before anything else.
- Skin lesions, redness, or shedding problems in amphibians — often water quality or a fungal or bacterial infection. Amphibian skin problems are vet cases; do not treat with over-the-counter fish medications.
- Algae taking over — too much light or too many nutrients. Reduce photoperiod, reduce feeding, add more fast-growing plants.
- Mould spreading across the soil — poor airflow and too-wet soil. Increase ventilation, add springtails, reduce misting frequency.
Reptile and amphibian vets are not always easy to find, so identify the nearest one before you have an emergency. Our guide on choosing a vet for your reptile covers what to look for, including exotic practice experience.
Maintenance routine that keeps it stable
Daily
- Check animals are active and behaving normally.
- Top up evaporation with dechlorinated water.
- Remove any uneaten food after a few hours.
Weekly
- 25-30% water change with dechlorinated, temperature-matched water.
- Test ammonia, nitrite, nitrate and pH.
- Prune plants, trim anything blocking the light or the filter.
- Mist the land area as needed to keep humidity up.
Monthly
- Clean the filter media in tank water (never tap water — chlorine kills the bacteria you are trying to keep).
- Check the heater, thermometer and light timers are still accurate.
- Inspect silicone joints and the back of the tank for leaks or dampness.
- Top up leaf litter and replace anything that has fully decomposed.
FAQ
How big should a beginner paludarium be?
Think 20 gallons long or larger. Small tanks are harder, not easier — temperature and water chemistry swing faster, and mistakes are less forgiving. Start bigger than you think you need.
Can I keep fish in the water section?
Some species work: small livebearers like endlers or guppies in the deeper water, or shrimp as a cleanup crew. But fish eat amphibian eggs and tadpoles, and amphibians may eat fish. If you are keeping breeding amphibians, keep the sections separate.
Do I need a lid?
Yes, for almost every animal. Paludariums are humid, and amphibians climb glass and escape through tiny gaps. A glass or mesh lid that maintains humidity and keeps the animals in is essential. Screen lids lose humidity; glass lids need ventilation holes.
Why is my soil always soggy and smelly?
Not enough drainage. Check the drainage layer is actually draining — the slope must run to the water, not into a dead corner. Add more springtails, which consume mould and decaying matter, and reduce misting.
Can I use tap water?
Only if it is dechlorinated and the chemistry suits your species. Chlorine and chloramine kill amphibians through their skin. Test your tap water first; many municipal supplies are too hard or too alkaline for soft-water species, in which case use reverse-osmosis water remineralised to the correct level.
The bottom line
A paludarium is a stream bank in a box, and it works when the boring engineering is done properly: sealed joints, real drainage, a drainage-to-water slope, adequate filtration, a complete cycle before animals go in, and a species list matched to the design. Skip those and you get a flooded floor, a smelly swamp or a tank of dead animals within a couple of months. Do them, and the paludarium becomes the lowest-maintenance, most beautiful enclosure in the room. Build the structure first, cycle second, plant third, and add animals last — in that order, every time.
Leave a Reply