
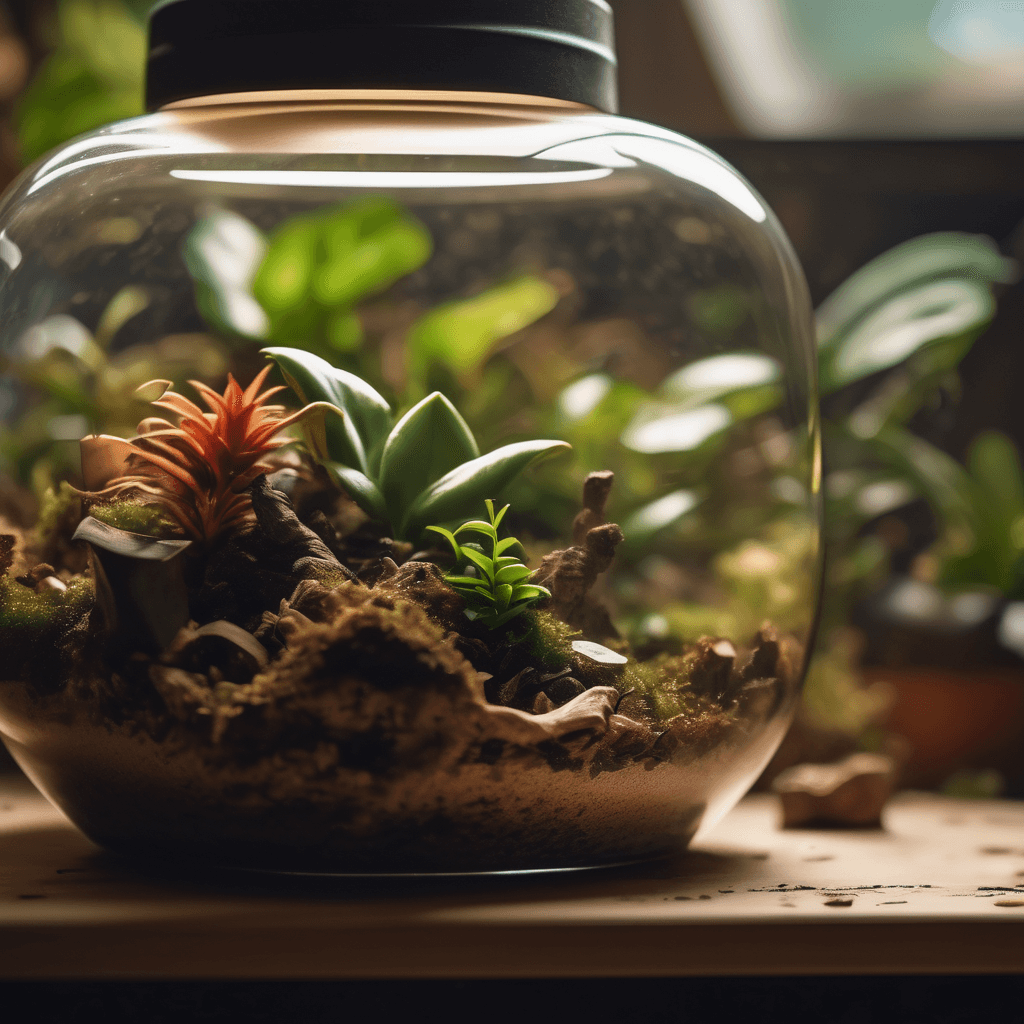
What “Bioactive” Actually Means
A bioactive terrarium is a self-sustaining miniature ecosystem: a layered substrate where beneficial bacteria and a “cleanup crew” of small invertebrates break down animal waste, dead leaves, and uneaten food into fertilizer for live plants, which in turn stabilize humidity and purify the air inside the enclosure. The keeper stops doing full substrate changes and starts topping off leaf litter.
It sounds exotic, but a bioactive setup is mostly soil, drainage, and patience — the same three things any planted tank or terrarium needs. What makes it go wrong is almost always one of two things: wrong layer depth for the species, or a cleanup crew that cannot survive the enclosure’s temperature and humidity. Get those right and the system runs itself.
This guide covers the layer-by-layer build, the cleanup crew species, the cycling period before animals go in, and the maintenance that keeps it alive. It is part of our reptile terrarium equipment series.
Who Should (and Should Not) Go Bioactive
Bioactive works beautifully for many species and is a poor fit for others.
| Great fits | Poor fits |
|---|---|
| Leopard geckos, crested geckos, African fat-tailed geckos | Desert species (some sand boas, certain Uromastyx) that need bone-dry substrate |
| Ball pythons, most terrestrial boas | Any species requiring sterile or very dry conditions |
| Corn snakes, kingsnakes, milk snakes | Very wet, hot enclosures where soil stays waterlogged |
| Bearded dragons (with careful drainage design) | Keepers who want a zero-maintenance tank — bioactive still needs weekly checks |
| Anoles, most tree frogs, poison dart frogs | Animals prone to substrate ingestion, where soil depth must be limited |
If your species needs near-zero humidity, bioactive is fighting the ecosystem the whole way. For everything else, it is usually the best long-term housing you can build.
The Layers, From Bottom to Top
1. Drainage layer (2–3 inches / 5–8 cm)
The foundation is a drainage layer: expanded clay balls (LECA) or aquarium gravel at the bottom of the enclosure, separated from the soil above by a plastic mesh screen. Its job is to give excess water somewhere to go so the root zone never drowns. In a front-opening terrarium this is essential; in a heavily planted, well-drained setup it can be thinner. Skip it only in enclosures you will water very carefully and where the soil mix is exceptionally free-draining.
2. Substrate barrier
A fiberglass window screen or plastic mesh cut to sit on top of the clay balls. It keeps soil from falling into the drainage layer while letting water pass through. Cut it one inch larger than the base so it wedges against the walls and cannot be undermined by burrowing animals.
3. Soil layer (3–6 inches / 8–15 cm)
The living layer. A proven mix for most tropical and semi-tropical species:
- 40–50% organic potting soil or coconut coir (moisture retention)
- 30–40% play sand or washed builder’s sand (drainage, digging texture)
- 10–20% compost or fine orchid bark (nutrients, structure)
Mix it dry, then moisten it to the dampness of a wrung-out sponge before it goes in. Never use garden soil straight from the yard — it carries pests, pathogens, and weed seeds. Never use potting mixes with added fertilizer pellets or moisture-control chemicals; those harm amphibians and invertebrates.
Depth depends on the animal: geckos need 3–4 inches, burrowing snakes and some skinks 4–6, dart frogs 3–4 with a false bottom if needed. Deeper than necessary is not better — it holds too much water in small enclosures.
4. Leaf litter top dressing
A layer of dried oak, magnolia, or almond leaves over the soil. This is the single most important bioactive surface. The leaves are the cleanup crew’s primary food, they hide the soil from the animal’s view (reducing stress), they hold humidity at the surface, and as they decompose they feed the bacteria. Two to three layers of leaves covering most of the floor is right. Top up the leaves as they break down — this is the main recurring consumable cost.
Avoid aromatic leaves (cedar, eucalyptus) and fresh leaves that mold. Live oak, magnolia, and Indian almond leaves are the standards.
5. Hardscape and hides
Place cork bark, wood, and hides before or alongside planting. Cork bark flats work as elevated basking spots and natural hides; a half-log hide gives terrestrial species the security this guide and our small reptile care guide both emphasize. Hardscape also creates the microclimates the cleanup crew needs — damp under the bark, drier in the open.
6. Plants
Plants are the lungs and humidity stabilizers of the system. Reliable choices:
- Pothos (Epipremnum aureum) — nearly indestructible, thrives in moderate light, climbs
- Philodendron — broad leaves hold humidity well
- Bromeliads — essential for dart frogs, hold water in their centers
- Snake plants and sansevieria — dry-tolerant, work in lower-humidity setups
- Spider plants, peperomia, fittonia — good ground cover
- Air plants (Tillandsia) — mounted on wood, no soil needed
Choose plants that match the light and humidity of the enclosure, and rinse the roots thoroughly before planting to remove nursery pesticides. Plant in holes poked through the leaf litter, then water them in.
Lighting note: plants need real light. A low-output UVB plus a bright LED plant light is the standard pairing; a UVB-only setup will slowly kill a planted bioactive enclosure. See our UVB guide for lamp selection.
The Cleanup Crew
The cleanup crew is the workforce. Without it, waste and mold accumulate and the “bioactive” is just dirty soil.
| Species | What they do | Notes |
|---|---|---|
| Springtails (Collembola) | Eat mold, fungus, and fine organic debris; live in the soil and leaf litter | The foundation species; add a culture at setup |
| Isopods (Armadillidium, Porcellio) | Shred leaves and consume waste; visible on the surface at night | The leaf-litter processors; several species for different humidity ranges |
| Dwarf white isopods | Small, fast-breeding, stay hidden in soil | Good for gecko enclosures; hard to see, very effective |
| Mealworms/superworms (occasional) | Heavy-duty waste processors | Controversial — they will pupate into beetles; many keepers skip them |
A standard starter culture is a few hundred springtails plus 20–30 isopods per medium enclosure. Both are sold online and at reptile expos for a few dollars. They reproduce on leaf litter and fish food flakes; you rarely need to re-add unless a crash occurs.
Temperature compatibility is critical. Standard isopods die above roughly 85°F (29°C). A bearded dragon enclosure with a 105°F (40°C) basking spot will wipe out the crew in the hot zone — place the colony in a cooler corner or accept that cleanup there is partial. Dart frog and gecko enclosures (75–82°F / 24–28°C) are ideal for crew survival.
Cycling: Do Not Rush It
This is the step impatient keepers skip, and it is the one that determines success. A newly built bioactive enclosure is not ready for an animal for 4–8 weeks.
- Week 1: Set up layers, plants, and leaf litter. Add the cleanup crew. Water the enclosure lightly so the soil is evenly damp but not soggy. Turn lights on the day-night cycle.
- Weeks 2–3: Mold will bloom — white fuzz on the soil and wood. This is normal. The springtails eat it and it disappears as the colony establishes. Do not panic and do not sterilize.
- Weeks 3–5: Mold fades. Plants put out new growth. Isopods become visible at night. Add a pinch of fish flake or a piece of leaf as test food — if it is consumed within days, the crew is working.
- Weeks 4–8: Place a thermometer and hygrometer at animal level. Confirm the warm side, cool side, and humidity hold steady through the cycle for three consecutive days. The enclosure is ready when the ecosystem is visibly alive: springtails on the surface after misting, mold gone, plants growing.
Only then introduce the animal. Putting a snake or gecko into a two-week-old bioactive enclosure means the animal is living on a bacterial bloom that has not stabilized — that is how respiratory infections and crop impactions from loose soil happen.
Temperature and Humidity Targets
A bioactive enclosure must meet the same species requirements as any other. The soil adds thermal mass: it warms slowly and holds warmth, so morning warm-up takes longer than a bare tank. Compensate with your heat source and thermostat — see the thermostat guide and our humidity guidance in the reptile humidity guide.
- Gecko enclosures (leopard, crested): 82–90°F (28–32°C) warm side, 70–75°F (21–24°C) cool side, 60–80% humidity depending on species
- Ball python: 88–92°F (31–33°C) warm, 76–80°F (24–27°C) cool, 55–65% ambient with a humid hide
- Dart frogs: 72–80°F (22–27°C), 80–100% humidity, no basking spot
- Bearded dragon: 95–105°F (35–40°C) basking, 80–85°F (27–29°C) warm side, 30–40% humidity — crew lives in the cool, planted corner
Soil also buffers humidity swings, which is one of bioactive’s real advantages: the enclosure stays stable through the day-night cycle in a way a paper-towel tank never does.
Ongoing Maintenance
Bioactive is low-maintenance, not zero-maintenance. The weekly routine:
- Weekly: Check temperature and humidity readings. Spot-clean visible waste if the crew has not reached it yet. Top up water in the soil if the surface is drying (mist or pour along the walls, not into the hide).
- Monthly: Add fresh leaf litter as the old breaks down. Check for mold outbreaks in damp corners — a persistent mold patch means too much water or too little crew; fix the watering and add more springtails.
- Quarterly: Prune plants, remove any dead plant matter, look for pests (fungus gnats are common — let the soil surface dry slightly and add predatory nematodes or more springtails).
- Annually: Refresh a portion of the soil mix if it has collapsed or gone compacted. Usually you only replace the top third.
The full substrate changes that a traditional enclosure needs every 1–3 months simply do not happen in a bioactive setup. That is the whole payoff: less mess, less animal stress, and an enclosure that looks and behaves like a slice of habitat.
Common Bioactive Failures
| Failure | Cause | Fix |
|---|---|---|
| Persistent white mold | Too wet, no crew, or airflow too low | Reduce watering, add springtails, increase ventilation |
| Isopods dying off | Temperature too high for the species | Relocate colony to cool zone; use heat-tolerant species |
| Soil turning swampy | No drainage layer or too frequent watering | Add drainage layer and mesh; water less, mist more |
| Plants dying | Insufficient light or wrong humidity for species | Add or upgrade plant lighting; match plants to enclosure |
| Fungus gnats exploding | Constantly wet soil surface | Let surface dry between waterings; predatory nematodes or BTI dunks |
| Animal burrowing under hides and losing weight | Too much loose soil for a surface-foraging species | Reduce soil depth, add flat hides on the surface |
Warning Signs: When to Call a Vet
Bioactive does not make animals immune to illness — but its warning signs can hide. See our reptile warning signs guide for the full list.
- Stargazing, tremors, or seizures in amphibians — can indicate chytrid fungus or neurological disease. Immediate vet visit; do not wait.
- Red, inflamed skin or bleeding patches in frogs — “red leg” syndrome, a bacterial infection often tied to poor water or substrate quality. Emergency.
- A reptile spending all day buried and refusing food for weeks — could be gravidity, brumation cues, or illness; a vet can distinguish them.
- Repeated regurgitation after feeding — often enclosure temperature, but if it continues after a husbandry fix, it needs veterinary assessment.
- Anything you cannot trace to an environment cause within 48 hours — that is the vet’s job, not a DIY experiment.
Final Checklist
- Drainage layer and mesh barrier installed
- Soil mix at correct depth for the species, damp not soggy
- Leaf litter layer covering most of the surface
- Cleanup crew introduced: springtails plus isopods
- Plants suited to the light and humidity, rinsed before planting
- Enclosure cycled 4–8 weeks with visible mold-then-clear sequence
- Temperature and humidity targets confirmed at animal level for three consecutive days
- Heat source on a thermostat; day-night light cycle on a timer
- Hides and hardscape placed before the animal
- Weekly check, monthly leaf top-up, quarterly prune scheduled
A bioactive enclosure is an investment of a few weeks of patience for years of easier, more natural keeping. Build the layers correctly, cycle it properly, stock the right crew for your temperature range, and the system runs itself. The reward is an enclosure that looks alive — plants growing, isopods working at night, a snake or gecko behaving the way it would in habitat — with a fraction of the weekly maintenance of a traditional tank.
Leave a Reply